


This video took a long time!
Credits at end of the film, created in Carrara 7 Pro
Enjoy!
 |
|||||||||
|

This video took a long time!
Credits at end of the film, created in Carrara 7 Pro
Enjoy!
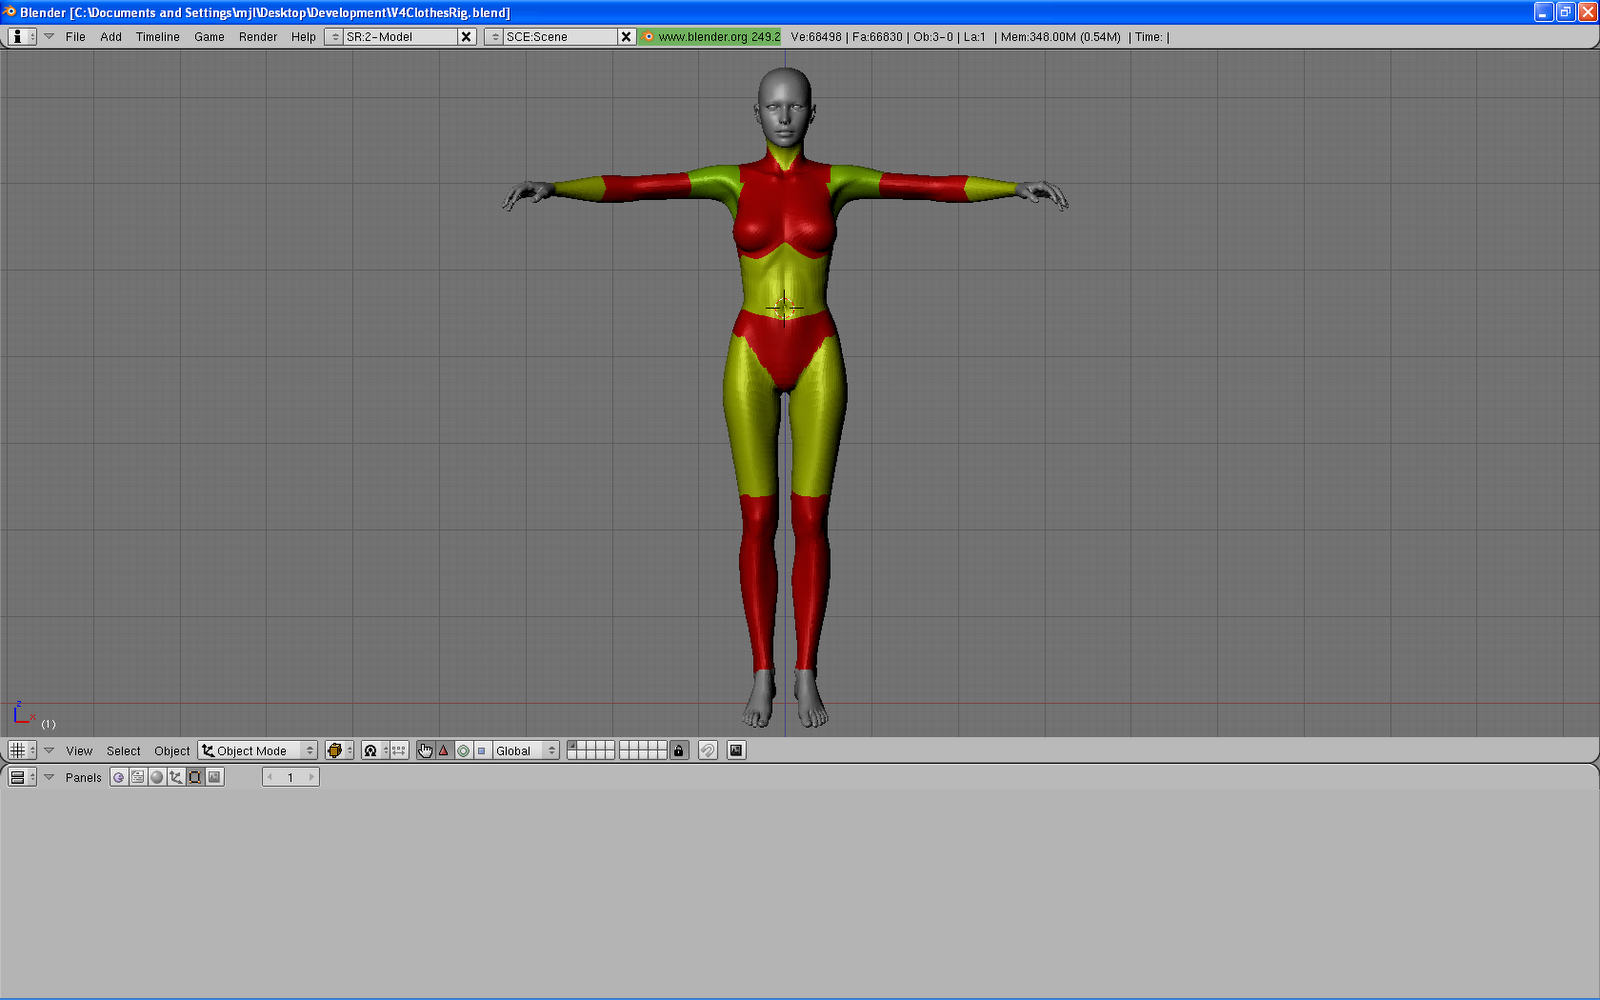
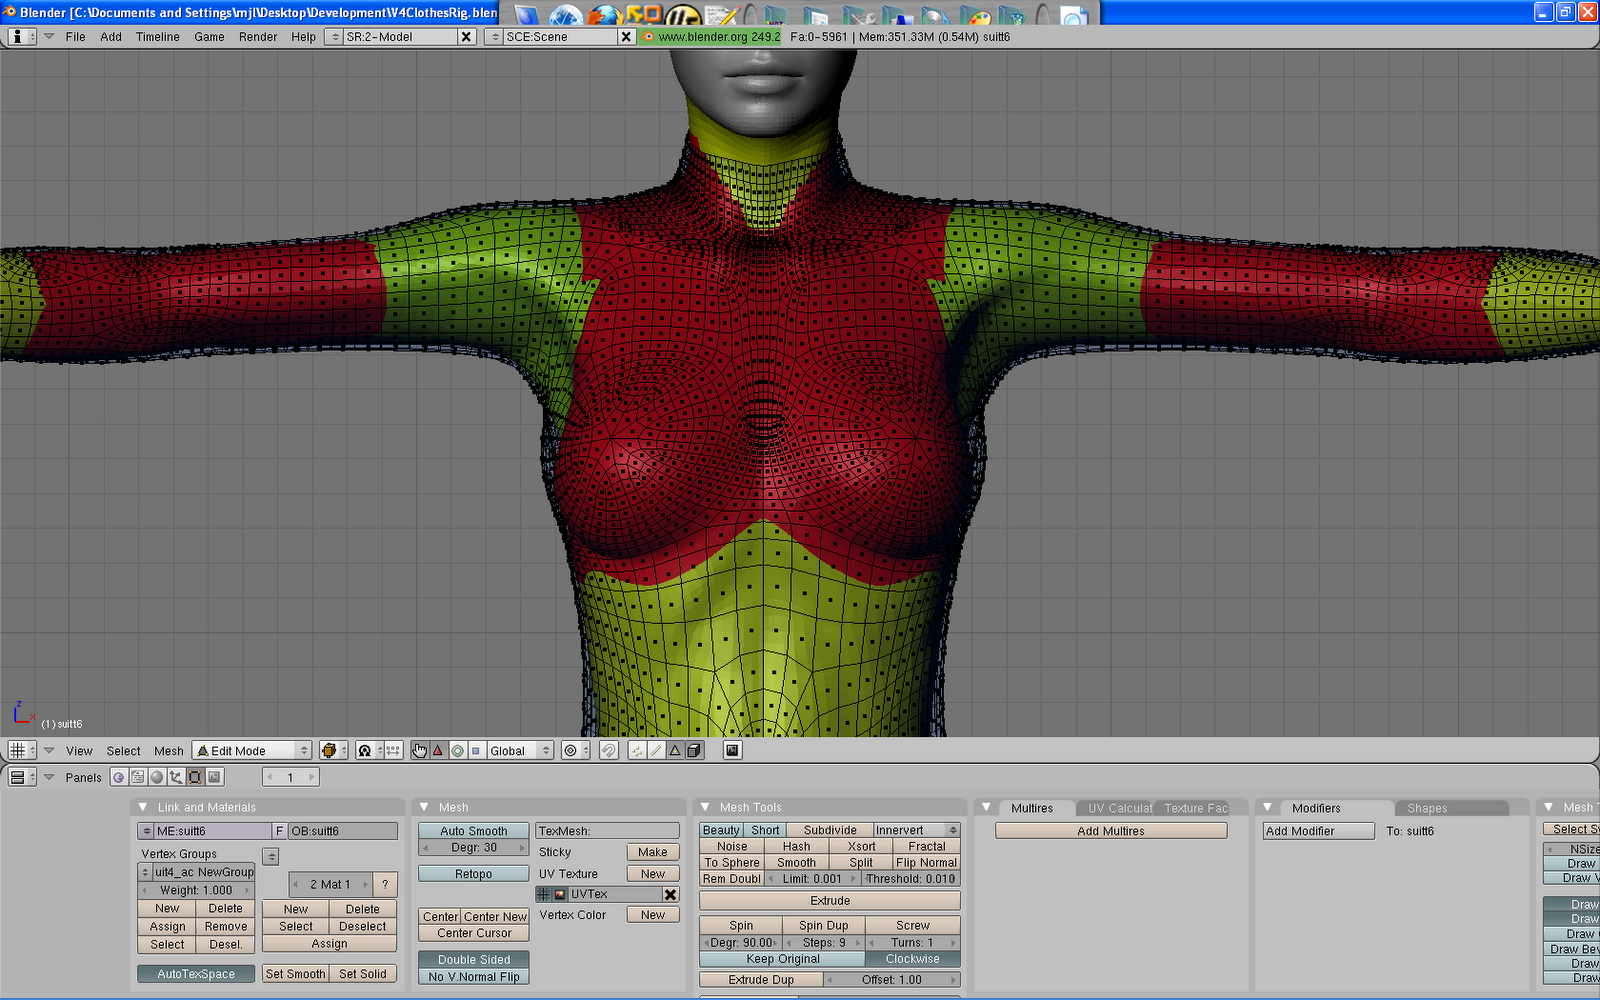
Make a Poser/Daz Character Clothing Guide in Blender
That looks like this:
1) File->Import->Waveform OBJ (Options – Polygroups, Vertex Order)
– NOTE: The import/export option “Polygroups” and “Vertex Order” is key for getting the groups in/out from/to Poser!
2) Delete Cube
3) Zoom in on Character
4) Place Cursor inside Character
5) Select Charater Object
6) Delete all Materials (Link and Materials button area)
7) “New” material (not sure why this step is needed…)
8) TAB to Edit Mode
9) AKEY to deselect all
10) Pick and “Select” desired Vertex Group
11) “New” material
12) Go to Shading (F5)
13) Change Material Color using Sliders
14) Return to Editing (F9)
15) REPEAT as needed, back to Step #9
NOTE: If you alternate colors, after making 2 material colors, you can just select the alternate color material instead of steps #11-14 which saves a lot of time!
Now you can import your clothing OBJ, change it to wireframe mode (so you can see the clothing rig below it) and start grouping (vertex groups)! Blender has box, circle, lasso, one-by-one, edge and face selection tools. It also allows you to occlude the background too, so you don’t select through your mesh (i.e. select the back when trying to get the front) When your done and export, make sure to select the options, polygroups and vertex order, again.
Like this!
Thanks to Paolo it looks like for the Blender import/export functionality: [LINK]
@pjz99 also made a cool rig template for V4, more can be found about it HERE
Below is an excerpt on the Elite Human Shader setup, taken from Artzone. I am citing the reference here, and do not consider this my work. I am posting it along with a direct link, just so that in case it goes away, OR I forget where it is I can quickly reference it:
“Elite Human Surface Shader.” ArtZone Wiki. 25 Jun 2010, 10:21 MDT. 1 Sep 2010, 08:12.
First time users can follow these instructions to get good results without having to wade through the extensive documentation provided by Omnifreaker. Once you see what you can achieve, you’ll be encouraged to read the documentation in detail.
1) First, Select the figure in the Scene Tab (VIEW –> Tabs –> Scene).2) Select the surfaces that you wish to apply the HSS to in the Surface Tab (VIEW –> Tabs –> Surface).
On the Generation 4 figure (V4, M4, etc.), these surfaces are ideal. To multi-select, press the ctrl button.1_Lip
1_Nostril
1_SkinFace
2_Nipple
2_SkinHead
2_SkinHip
2_SkinNeck
2_SkinTorso3_SkinArm
3_SkinFoot
3_SkinForearm 3_SkinHand
3_SkinLeg3) Apply the Human Surface Shader. Make sure that you do not remove the underlying texture. Here’s how to do it.
a) Find the icon for the Human Surface Shader as directed by the readme here:
DAZ Studio portion of Content Tab ? Shaders ? omnifreaker ? Human Surface ? !HumanSurface Base
b) Hold down the CTRL button on the keyboard and double-click the !HumanSurface Base icon
c) You’ll see an option window labeled “Shader Preset (!HumanSurface Base)” appear.
d) For Surfaces, choose “Selected” and for Map Settings, choose “Ignore.” The Ignore part is important. If you choose, Replace, the texture maps (.jpg), will be removed and the figure will look pale grey and very much wrong. Press ‘Accept.’4) The EHSS is applied, but the figure looks a bit ‘shiny.’ Now you need to fine-tune the settings. There’s a great deal of variation possible, but try using these settings given here and then modify as you wish. Go to the Surface Tab where you should still have the above surfaces selected. In the lower half under ‘Advanced.’ Then modify the properties as indicated below:
a) Bump: if the base textures have a bump map, change this from Off to ‘On.’ Most textures do. b) Displacement: if the base textures have a displacement map, change this from Off to ‘On.’ If you turn this on, then change ‘Trace Displacements’ to ‘On’ also.
c) Specular Strength: Change this from 100% to 25%. The excessive shininess with disappear on the figure.
d) Velvet: Change to ‘On.’ Velvet Strength: Change from 100% to 10%. This is one of the powerful properties of the EHSS that adds much realism.
e) Subsurface Scattering: Change to ‘On.’ Subsurface Scattering Strength: Change from 100% to 25%. This property adds wonderful realism to the figure.5) As you can see there are many other properties and settings you can play with. However, the above settings will give you good results. Once the shader is fine-tuned, it’s ready to be rendered. You may still need to add lighting and make other improvements in the scene before you do so.
This is just a basic quick tutorial for grouping a mesh in Blender. Since my interest in modeling seems to sway like a tree in the wind, whenever I lean back into Blender, I forget the basics. This is really to help me remember the best way to do it:
1) Open the model
2) Commands for moving around:
– ALT-LMB = Rotate
– SHIFT/ALT-LMB = Move
– CTRL/ALT-LMB = Zoom
3) Go To Edit Mode
4) Vertex Groups are in the bottom left
5) Choose the vertex group
– click Select to show it
– press H to hide it, if needed (after Selecting it)
6) Work in Face Select Mode (CTRL-Tab-3)
7) Start selecting faces to Assign to the Vertex group
– SHIFT-RMB to select a single face
– B to start Box-Drag-Select, drag and press LMB
– BB to use Circle select, press LMB to select (PGUP/DN to change circle size)
– CTRL-LMB for Lasso select
8) When done, press Assign in the vertex group area
Just so I remember, since upgrading to 2.5 Blender threw me off with a different layout of options:
Import Options:
1) Polygroups
2) -X90 (not absolutely necessary)
3) Keep Vert Order (in Blender 2.49, not in 2.54 Beta 2)
4) Object (in Blender 2.5x)
Export Options:
1) Rotate X90
2) Keep Vertex Order
3) Objects as OBJ Objects (Selection Only in 2.49)
4) UVs
5) Polygroups